Website Design for Creatives: How to Change and Edit a Showit Template
If you are a Showit user, or soon-to-be user, you’ve likely been sold on the platform for its creative freedom and ability to create fun and unique websites. If you are still in the deciding process, I recommend you start here, where we break down some top platforms.
Showit is a powerful platform, primarily used to create websites for creatives and websites for service providers (although e-commerce isn’t off the table… we can get into that another time.) But unless you are willing to invest in some crucial education on how to use Showit, you will likely want to either hire a Showit website designer or start with a template.
If DIY-ing is your go-to option right now, then take some time to research the perfect template for you. Showit has some free templates, or you might choose to visit their template shop where you can buy one that may have more of the built-in features you need. You can also seek out independent professional website designers on Instagram or Google, many of whom also sell their own Showit templates (as we do, here).
A good template will also come with some how-to videos to make sure you can customize your colors, fonts, and images to make your website exactly what you need. But, if you are starting from free, let’s go through some key tips to getting you started.
Customizing Your Showit Template
1. Start with your brand.
Whether you have created a logo, color palette, and font suite yourself or have hired a branding expert to do it for you, this is a non-negotiable first step. Without this piece, your website will likely look cluttered and inconsistent; a big no-no when trying to look professional and legit.

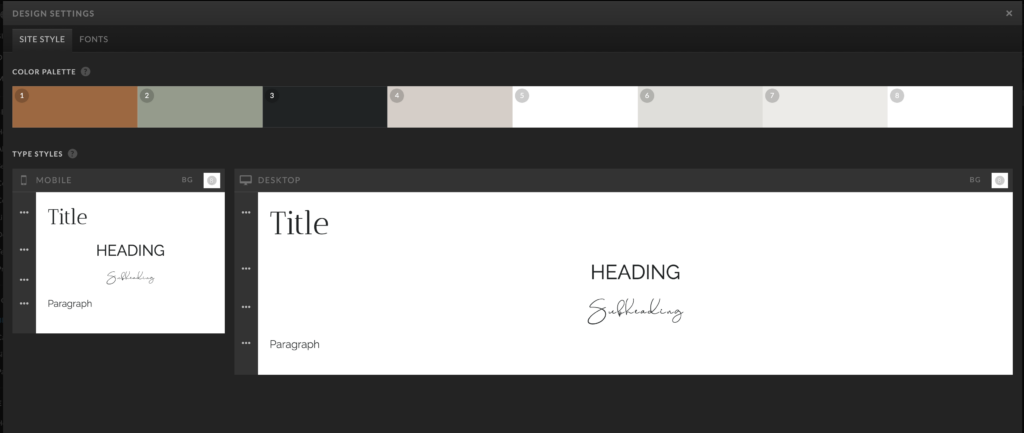
2. Go into your design settings.
Here you will add your colors, fonts, images and logos.
3. Adjust your colors and fonts as necessary
Now that you have added in your branding, sometimes they don’t carry over to the template exactly as you envisioned. This is where Showit is so handy and allows you to make simple changes really easily. You may want to change the font for your buttons, or colors of canvas backgrounds, just to make sure everything is readable and matches the vibe you are going for.
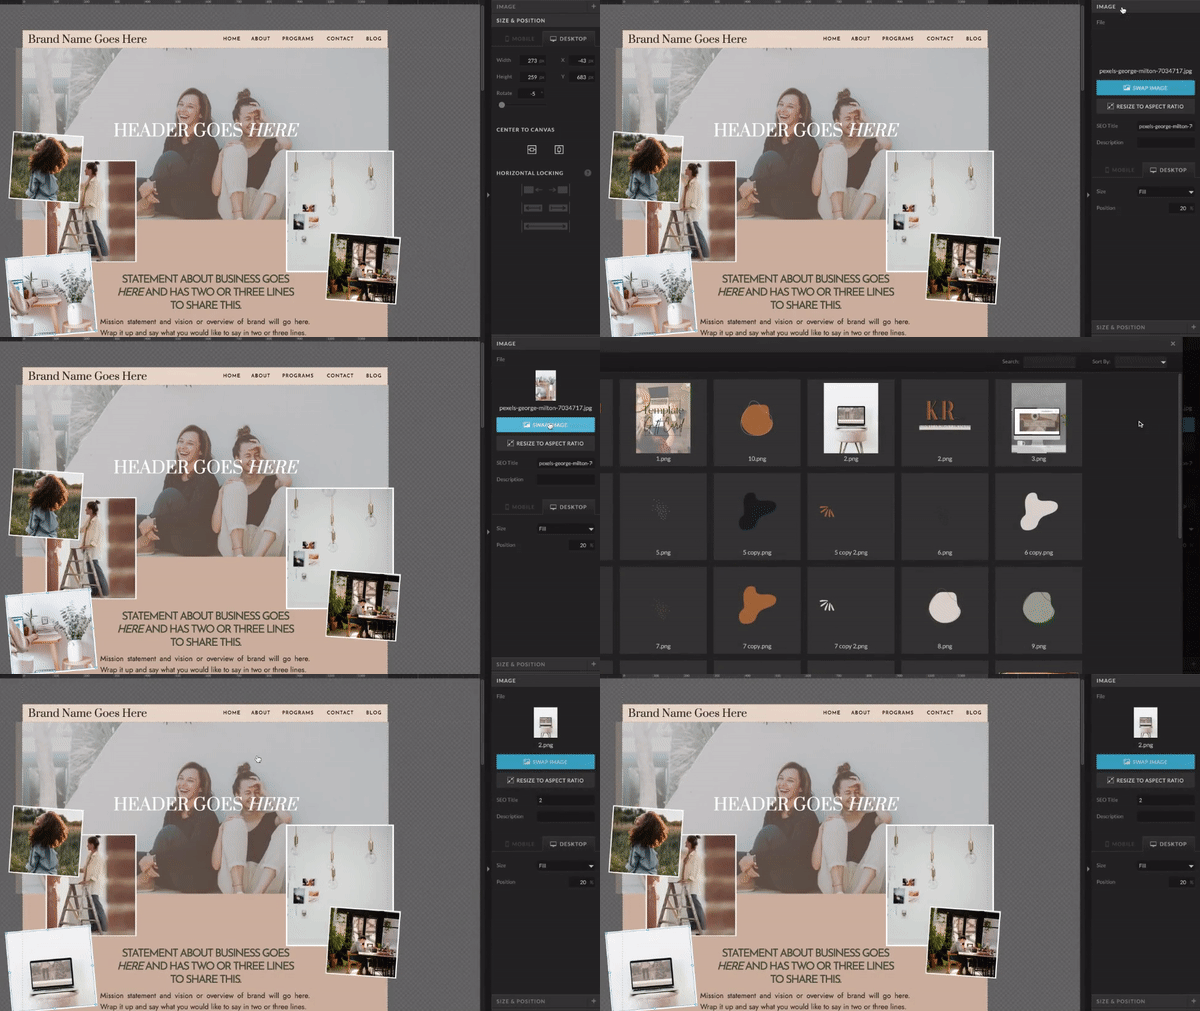
4. Get into Images and Copy
This is one of my favorite steps because it makes such a big difference. Once you have loaded all of your images into your media library, you can click on any image on your template, change image, and make the adjustment in seconds. Go through your whole site to change out the pictures to represent your small business.

Changing out your website copy is just as simple. Click on the text, type your new words, and adjust the sizing as necessary. You may choose to work with an SEO-certified copywriter to do this step for you. We have a package that includes copy to really bring your website to that next step.
5. SEO
Showit has a great post on their SEO features here, or if you want to take it a step further, try hiring an SEO strategist to help make sure your website is fully optimized.
6. Finally, connect your domain and PUBLISH!
Hit that connect your domain button up top and follow the steps given. Don’t be afraid to use Showit’s customer support for this step if it something you’ve never done before. They are always super helpful!
Once it is connected, hit the publish button and give yourself a pat on the back! Or pour a glass of champagne, you deserve it 😉
Hopefully these step-by-step instructions help you get your Showit template up and running in no time. If just the thought of doing it all yourself sounds like a headache, our team is happy to help with our Showit Template Customization service. You buy the template of your choice, we get your branding, images, and copy all loaded in for you. Sound more your style? Contact us here to get the process started.
January 17, 2023
showit + squarespace brand and website designer for creative service providers
Order up!